Angular 2: Up and Running and custom Gravatar component
, on JavaScript
We have come a long way since the release of Angular v0.9.x. We now have Angular 2. Although it’s still in beta version. Angular 2 is radically different from its predecessor, Angular 1. We no more can write an Angular application using just ng-app directive, that kicks off everything, and initialize angular bindings and lot of other stuff.
As Angular 2 has its dependency over TypeScript language, we need something more to setup an application now. We’ll see how to bootstrap an Angular 2 application, and how to build a custom Gravatar component (we’ll talk what are components, as we move ahead), that would fetch user’s image from Gravatar as we enter the email address.
To begin with we need a text editor. I’m using WebStorm for the projects. But that would be overkill to use for this purpose. My personal favorite is Visual Studio Code for the JavaScript development. Point to note here, as both the TypeScript and Visual Studio Code are from the house of Microsoft, they have added an excellent support of TypeScript in Visual Studio Code.
Let’s get started now!
First, create an empty directory let’s call it angular2-quickstart, wherever you like in the file system, and create three files, as I’m showing below. (for the note, you can clone the repository from https://github.com/ManvendraSK/angular2-quickstart).
1. package.json
{
  "name": "angular2-quickstart",
  "version": "1.0.0",
  "scripts": {
    "start": "concurrently \"npm run tsc:w\" \"npm run lite\" ",
    "tsc": "tsc",
    "tsc:w": "tsc -w",
    "lite": "lite-server",
    "typings": "typings",
    "postinstall": "typings install"
  },
  "license": "ISC",
  "dependencies": {
    "angular2": "2.0.0-beta.9",
    "systemjs": "0.19.24",
    "es6-promise": "^3.0.2",
    "es6-shim": "^0.33.3",
    "reflect-metadata": "0.1.2",
    "rxjs": "5.0.0-beta.2",
    "zone.js": "0.5.15"
  },
  "devDependencies": {
    "concurrently": "^2.0.0",
    "lite-server": "^2.1.0",
    "typescript": "^1.8.7",
    "typings":"^0.7.5"
  }
}
This file lists all the dependencies and dev dependencies, along with some handy scripts. Among these scripts is a start script that runs two other scripts concurrently, tsc:w and lite. tsc:w compiles the TypeScript files as we change them, and lite is a lite server that reloads the browser, whenever any asset changes in our application.
2. typings.json
{
  "ambientDependencies": {
    "es6-shim": "github:DefinitelyTyped/DefinitelyTyped/es6-shim/es6-shim.d.ts#4de74cb527395c13ba20b438c3a7a419ad931f1c",
    "jasmine": "github:DefinitelyTyped/DefinitelyTyped/jasmine/jasmine.d.ts#d594ef506d1efe2fea15f8f39099d19b39436b71"
  }
}
This file lists all the dependencies, which are actually TypeScript Definitions, and are required by TypeScript compiler. This is necessary, as TypeScript needs to know how to work with these JS libraries. Thus, these files listed inside the ambientDependencies basically provide the definitions of the symbols, nothing fancy.
If you remember from the package.json file, we have listed typings as a dev dependency. This is the tool that manages these definition files. To list all the installed dependencies we can execute npm run typings -- list. Notice, we are here providing double dashes before the arguments of typings command. That’s because we are actually executing the script listed in the package.json, and to pass the arguments to the actual command we need these double dashes. To search for the dependencies execute npm run typings -- search lodash. We are searching here for the lodash library definitions. Execute npm run typings -- help for the help on this command.
3. tsconfig.json
{
  "compilerOptions": {
    "target": "es5",
    "module": "system",
    "moduleResolution": "node",
    "sourceMap": true,
    "emitDecoratorMetadata": true,
    "experimentalDecorators": true,
    "removeComments": false,
    "noImplicitAny": false
  },
  "exclude": [
    "node_modules",
    "typings/main",
    "typings/main.d.ts"
  ]
}
This file lists the instructions for the TypeScript compiler itself. I suggest you going through https://angular.io/docs/ts/latest/guide/typescript-configuration.html#!#tsconfig and http://www.typescriptlang.org/docs/handbook/compiler-options.html after finishing here.
We are finished with the listings of the dependencies for our Angular 2 application. Now just execute the npm install command, and this would download all the dependencies. This command will also execute the postinstall script listed inside the package.json file automatically, that would install all the TypeScript definitions listed inside typings.json file.
Now go ahead and create an index.html file and an app folder. The resulting directory should be looking as follows:
angular2-quickstart/
|-- app/
|-- typings/
|-- node_modules/
|-- index.html
|-- package.json
|-- tsconfig.json
|-- typings.json
Now go ahead and add following content to your index.html file:
<!DOCTYPE html>
<html>
    <head>
        <title>Angular 2 Bootstrap</title>

        <meta name="viewport" content="width=device-width, initial-scale=1">

        <script src="node_modules/es6-shim/es6-shim.min.js"></script>
        <script src="node_modules/systemjs/dist/system-polyfills.js"></script>
        <script src="node_modules/angular2/es6/dev/src/testing/shims_for_IE.js"></script>

        <script src="node_modules/angular2/bundles/angular2-polyfills.js"></script>
        <script src="node_modules/systemjs/dist/system.src.js"></script>
        <script src="node_modules/rxjs/bundles/Rx.js"></script>
        <script src="node_modules/angular2/bundles/angular2.dev.js"></script>

        <script>
            System.config({
                packages: {
                    app: {
                        format: 'register',
                        defaultExtension: 'js'
                    }
                }
            });
            System.import('app/main').then(null, console.error.bind(console));
        </script>
    </head>

    <body>
        <my-app>Loading...</my-app>
    </body>
</html>
Following is the explanation what is going on in this file:
We are including the essential libraries using various script tags. They are self-explanatory.
Inside a separate script tag we are configuring the SystemJS library, and telling it what to do when it sees the requests from the app/ folder. More information can be found at https://github.com/systemjs/systemjs/blob/master/docs/config-api.md#packages.
It then imports the main module from app/main.ts file, which we would be writing soon, and then writes to the console any errors, if they occur.
Inside body tag, we are using a custom tag named my-app, which we would be building later in this tutorial.
Inside your app folder create two files app.component.ts and main.ts file and paste following contents:
1. app.component.ts
import {Component} from 'angular2/core';

@Component({
    selector: 'my-app',
    template: `
        <h1></h1>
        <p></p>
        <input type="text" [(ngModel)]="title" placeholder="Heading here">
    `
})
export class AppComponent {
    title:String = "Angular 2 Bootstrap";
    description:String = "My first Angular 2 app's description";
}
2. main.ts
import {bootstrap} from 'angular2/platform/browser';
import {AppComponent} from './app.component';

bootstrap(AppComponent);
You might think, what just happened? What are those weird code statements, including @Component and import keywords? This is the ES6 proposed syntax. TypeScript fully adheres to those specifications. Angular 2 is now a component based framework. Angular 2 no more advocates scopes and controllers. A component is routable, it has its logic in an ES6 class, and a template inside an HTML file. For the sake of this tutorial, I have merged all the things inside the one file.
As we are using separate files, for code organization, whatever defined inside them is not available in global scope. So, to expose those things to outside world we need to export them, and then import them wherever we want to use them. As we can see, we have exported AppComponent class from app.component.ts file and imported inside main.ts file using the import statement.
Inbuilt modules can be imported just by using the module name inside the quotes, but custom modules can only be imported by using the relative path to the module, as in the case of AppComponent. Inside the main.ts file we have imported bootstrap function from angular2/platform/browser module, and our custom AppComponent component from app.component.ts file. Every angular application needs a top level parent component, in this case, our AppComponent. We pass that top level component to the bootstrap function, which then kicks off everything. This leaves to us to the question, how to create custom components? That’s what the app.component.ts file is doing.
app.component.ts file is exporting a TypeScript class named AppComponent which is decorated by a Component decorator, imported from angular2/core module, which contains additional metadata for the component using a JSON map. This metadata contains a key called selector which tells angular what would be the HTML tag, Angular 2 will be using to instantiate this component, in this case, it’s my-app. If you remember, inside our index.html file we are using this tag, and the System.import statement is actually loading this main.ts file, which contains the bootstrap function. This AppComponent class has two properties title and description. These are declared in TypeScript way whose syntax is as follows;
propertyName: propertyType [= propertyInitializer];
All the things inside the square brackets are optional.
We are using these properties inside the component’s template wrapping inside double curly braces. HTML template is declared using the template key of the JSON map of the Component decorator. If you notice we are wrapping our HTML template inside backquotes (`), this is the new ES6 specification, that says how to include multiline strings.
In Angular 2 we have one-way and two-way bindings. One-way bindings are declared using double curly braces, and two-way bindings are declared using [(ngModel)] notation, as we can see on the input element. This two-way binding syntax is a little odd. Let’s dissect it.
Whenever we want to set a property of an HTML element on the page we set that property directly, we don’t use any ng-* attribute, i.e., ng-hide, ng-src etc. This concept is known as Shadow DOM in Angular 2. It means, to set any property we use square brackets. i.e., to set src property of an img tag, we would use following code:
<img [src]="myImageUrlPropertyOfComponent">
It means the data is flowing from the component property to the element’s property.
Similarly, to call methods on our component, we would use parentheses. i.e., to listen for the click event of an img tag, we would use following code:
<img (click)="callMyComponentMethod()">
It means the data is flowing from the element to the component.
Thus, to facilitate the two-way binding we have this odd looking [(ngModel)] syntax!
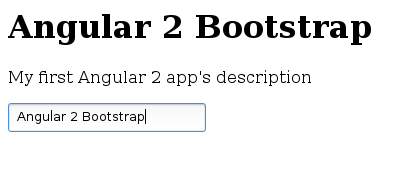
Now is the time to see all the things and our hard work in action. Execute the command npm start! This command will trigger and listen for any changes on a lite server. This command will automatically launch your default browser, and you should see your app running. You will be able to modify the H1 tag through the input box, as both are bound to the same component property, in this case, title.
Congratulations, we have our first ever Angular 2 up and running. If you now try to modify the files, i.e., let’s change title property to your liking and save the file. Angular 2 will automatically detect the changes and reload the browser with your changes. Amazing… isn’t it!
Creating a custom component
Now let’s move ahead with a custom Gravatar component. This component would load the Gravatar picture, provided the email. The inspiration of this component is from Ember.js site, it is the first framework which provided component based architecture. I’ve also used a md5 hash calculation code from here https://github.com/killmenot/webtoolkit.md5.
To create the component add a new file gravatar-image.component.ts inside app folder, and paste following content:
import {Component, Input} from 'angular2/core';
import {md5} from './md5';

@Component({
    selector: 'gravatar-image',
    template: `
        <div id="container">
            <img [src]="getGravatarImage()">
            <input [(ngModel)]="email" type="email" placeholder="Enter your Gravatar email">
        </div>
    `,
    styles: []
})
export class GravatarImageComponent {
    @Input() size:number = 200;
    @Input() email:string = "";

    getGravatarImage():string {
        return 'http://www.gravatar.com/avatar/' + md5(this.email) + '?s=' + this.size;
    }
}
Here are some new things. We are importing Input decorator along with Component decorator from angular2/core module. We are also importing md5 function from md5.ts module. You can look for the source code on the Github. We have one additional styles key inside component decorator JSON map. Let’s dissect what is happening here.
We are declaring two properties inside
GravatarImageComponentclass;sizeandemail. These two properties are decorated usingInputdecorator. ThisInputdecorator specifies, that this component expects two properties from the user which we can specify as follows, when using thegravatar-imagetag:<gravatar-image [size]="220" [email]="'email@domain.com'"></gravatar-image>Without this
Inputdecorator, there is no way to pass the data to this component. This holds true for directives also. Yes, Angular 2 has directives, but those are now just normal classes like our components.We have created a method named
getGravatarImage()that returns the Gravatar image URL while calculating the md5 of the email, and appending the size parameter. We are using this method inside our component’s template, setting the result to thesrcproperty ofimgtag.We are also creating a two-way binding to our email property on the input element.
We have an additional
styleskey, which we can use to style the component. The style we define for components is component scoped. It means they don’t leak to our application or to other components. You can see the full listing on the Github for this component.
Now, we have our component in place. If you still have npm start running, then you would automatically get a gravatar-image.component.js file, which is a proof that Angular 2 is detecting the changes automatically.
To use this custom component, just use the gravatar-image tag inside any component (Yes, we now have nested components. We would build an Angular 2 application by nesting multiple components). But including just the tag is not sufficient. You need to tell Angular 2, where to look for the definition of this custom tag. This is where, we have another key inside the Component decorator, and it’s called directives. Here is the snippet that shows how we can use this directives key.
import {GravatarImageComponent} from './gravatar-image.component';

@Component({
    // other code.
    template: `
        <!-- other html. -->
        <gravatar-image [size]="220" [email]="'email@domain.com'"></gravatar-image>
    `,
    directives: [GravatarImageComponent]
})
export class AppComponent {
    // class code here.
}
Here is this component in action!
![]()
![]()
As you type an email into the input box, and if there is a valid account associated with that email, the image will load instantly (or depending on your internet connection speed), or we would have just plain Gravatar logo.
Conclusion:
I’ve worked with Ember.js 2 and Angular 1. Angular 2 is looking much familiar, may be due to the use of Ember.js. Angular 2 is built on the notion of components, and that’s a good idea IMHO. API is still in beta, and there is very low documentation for it. I hope the API soon becomes stable and documented. There is also work going on for a tool that would generate Routes and Components, the tool is being called ngcli. This tool is greatly inspired by ember-cli. I’ve used ember-cli, and think ngcli prove same useful.
Thanks for reading till here. See you next time.