An Idiot's Guide to Service Workers — Implementation — Part 1
, on JavaScript
This article is not about the basics of the Service Workers (SW now onwards). There are plenty of other tutorials on the internet and the best one is from Google. This article will list down how to make use of SW on a production website and fix certain problems you might run into along the way.
A SW implementation depends on your build system.
Either you can go with manual setup (Instantiating SW, handling its lifecycle events, handle the cache invalidations, the list goes on), and all these tasks come with their own overheads, and at the end you’ll have a long SW JavaScript file that is little hard to manage in the long run like all the other JavaScript code we write.
Or better to use some 3rd party solution. Specifically, Workbox, again from Google.
I went with the 2nd option because of the following reasons:
Utilizing well tested approach instead of inventing my own (one of the software design principle), and,
We are employing Webpack as our build tool, and Workbox provides a Webpack plugin that integrates well with Webpack assets generation pipeline.
Let’s see how we integrated this Workbox plugin within our project, and later I’ll discuss the problems we ran into and putting the whole project in jeopardy because of little to less knowledge on the topics like How the Browser’s Cache storage works and How to handle the headers on the CloudFront. Head on to Part 2 if you want to skip this implementation article altogether.
Installation of the Workbox Webpack Plugin
The first task is to install the Workbox Webpack plugin. Install it using the command npm install workbox-webpack-plugin --save-dev.
Implementing SW Loader/Instantiator
Create a new file serverWorker.js and add this to your application’s client entry point (There will be a server entry point also in case you have an Isomorphic application).
// serviceWorker.js

if ('serviceWorker' in navigator) {
  window.addEventListener('load', () => registerSW());
}

function registerSW() {
  navigator.serviceWorker.register('/sw.js')
    .then((registration) => {
      console.info('ServiceWorker registration successful: ', registration, ' ', '😍');
    }, (err) => {
      console.error('ServiceWorker registration failed: 😠', err);
    });
}
Now import this file in your client entry point (in my case client.js) using import '<path>/serviceWorker';. This will cause this SW to install whenever your application is loaded inside a Browser. If you notice closely then you can see we are loading an HTTP path that goes to sw.js file. This sw.js file will actually contain your SW code. You also need to provide a way to serve this file from your server. Let’s create this file next.
Implementing the Actual SW Configuration
Create a new file sw.js and put inside this some Workbox related configuration. We’ll talk about it just in a bit.
// webpack/sw.js

workbox.skipWaiting();
workbox.clientsClaim();
workbox.core.setCacheNameDetails({
  prefix: 'myappname',
  suffix: 'msiv1'
});

workbox.precaching.precacheAndRoute(self.__precacheManifest);
To understand what those skipWaiting and clientsClaim method calls are we need to understand a bit of SW life cycle12.
This is not an exhaustive introduction, just a little bit overview, please check footnote links for more information.
Every SW has some lifecycle events And out of those, Install and Activate are the ones we are interested in. Whenever a new page is requested very first time a SW’s Install event is fired, and as soon as it has finished installing its Activate event is fired, and the SW activates and starts to intercept the network calls.
So far so good.
Now if you refresh the page the SW will install again, but this time after installing it will go to Waiting state, instead of Activate. The reason is we already have existing SW from last time. Now, the existing SW will give up its client (the page), and the new SW will Activate. So, this is a bit of delay before new functionality is available to our page.
This is what above two statement does essentially. It’ll skip the SW waiting phase and it will claim all the clients as soon as it Activates.
Let’s come back from that little detour. The method setCacheNameDetails merely let the Workbox know the name by which it should name the cache.
Precaching, Huhh??
Let’s talk a bit about the precaching3, which is what our last line basically does. Precaching essentially means to cache our assets (JavaScript and CSS) in the background into the Browser cache store as soon as our SW Installs and Activates. That mysterious variable self.__precacheManifest is an array, which is usually generated by the Workbox Webpack plugin in a separate file usually named precache-manifest.<revision>.js in your dist or build directory, that contains all our assets along with their hash/revision.
// precahce-manifest.<revision>.js

self.__precacheManifest = [
	{
		"url": "/mobile_assets/home-182321.js"
	},
	{
		"url": "/mobile_assets/icons.svg",
		"revision": "932723"
	}
];
A Thought on What to Cache and What to Not
Time to take a step back and think about what are the things we would like to cache onto the user’s browser. There are few items to be considered, Images, Fonts, API calls, HTML, CSS and JavaScript. Anything else? I think this list will do for now.
If you remember, we have already cached our CSS and JavaScript using the Workbox precaching. What about the next items? Let’s take them one by one.
a. Images: You might not want to cache these, as these will quickly fill the cache quota you have been allotted by the browser. So, my advice is to ignore these.
b. HTML: This will also quickly fill the cache quota if your page is rendered from the server in case of your application is isomorphic. So, ignore this one also. You can however always cache the Home page. Put this inside your sw.js file.
// webpack/sw.js

workbox.routing.registerRoute(/(\/$|\/\?.*$)/, workbox.strategies.networkFirst({
  cacheName: 'pages-cache',
  plugins: [
    new workbox.expiration.Plugin({
      maxAgeSeconds: 1 * 24 * 60 * 60 // 1 Days
    })
  ]
}));
c. API calls: You can always cache the API calls. They don’t take up much quota space. Put this inside your sw.js file.
// webpack/sw.js

workbox.routing.registerRoute(/.*\/my_api\/v1.*/, workbox.strategies.staleWhileRevalidate({
  cacheName: 'apis-cache',
  plugins: [
    new workbox.expiration.Plugin({
      maxAgeSeconds: 1 * 24 * 60 * 60 // 1 Days
    })
  ]
}));
d. Font cache: You can cache your fonts also. Put this inside your sw.js file.
// webpack/sw.js

workbox.routing.registerRoute(/.*woff/, workbox.strategies.cacheFirst({
  cacheName: 'fonts-cache',
  plugins: [
    new workbox.expiration.Plugin({
      maxAgeSeconds: 1 * 24 * 60 * 60 // 1 Days
    })
  ]
}));
Let’s see what we did actually. We are telling Workbox to intercept some URLs based on the first parameter to the regiserRoute method. E.g, in our apis-cache case we are using a RegEx to intercept our API calls to the server. The second parameter to each of the registerRoute methods is a Workbox Strategy. A Workbox Strategy is simply a Caching Pattern that determines how a SW handles the fetch request and then respond to the client (the browser).
We have used three types of strategies networkFirst, staleWhileRevalidate and cacheFirst. Let’s define what these three strategies actually do in brief:
- networkFirst: SW will go to the network when it receives the request, but, if it fails in doing so, it’ll send the response from the cache.
- staleWhileRevalidate: SW will respond from the cache first, then it will go to network and update the cache.
- cacheFirst: SW will respond from the cache first, but, if it fails in doing so, it’ll send the response from the network.
You can read in detail (with diagrams) about these strategies here4.
The Usage of Workbox Webpack Plugin
Our SW file sw.js implementation is now complete. But it’ll not work on its own. Our next step is to configure the Workbox Webpack plugin5, that’ll utilize our sw.js file.
Workbox Webpack plugin provides two classes GenerateSW and InjectManifest.
- GenerateSW: This plugin should be used if you want a simple setup and don’t want to use Web Push and additional logic inside your SW file.
- InjectManifest: This plugin provides complete access to Workbox API and you want to have complex routing configuration. We chose this one.
Here is the Webpack configuration snapshot on how to include this plugin.
// webpack/client.dev.js and webpack/client.prod.js

module.exports = {
  // ...
  plugins: [
    new WorkboxPlugin.InjectManifest({
      swSrc: path.join(__dirname, 'sw.js'),
      swDest: 'sw.js',
    })
  ]
};
InjectManifest plugin expects an object of properties. Here we are passing two properties.
- swSrc: It’s a SW file (sw.js) path which we have written earlier.
- swDest: It’s a SW destination file path where our sw.js should be copied. It is usually your project’s build/dist directory which is defined by the
output.pathproperty of Webpack.
The Route that Serves Us All
Well, we have come a long way but there are couple of things to take care of. Remember, in section Implementing SW Loader/Instantiator, I talked about serving sw.js file from your server? It’s essential that you serve this file at the root of your application without any redirect so that visiting http://<your-app>/sw.js should open the sw.js file without any redirect be it temporary or permanent one.
  // server.js

  const app = new express();

  app.get('/sw.js', (req, res) => {
    res.setHeader('Cache-Control', 'max-age=0, no-cache, no-store, must-revalidate');
    res.sendFile('sw.js', { root: path.join(__dirname, 'dist') });
  });
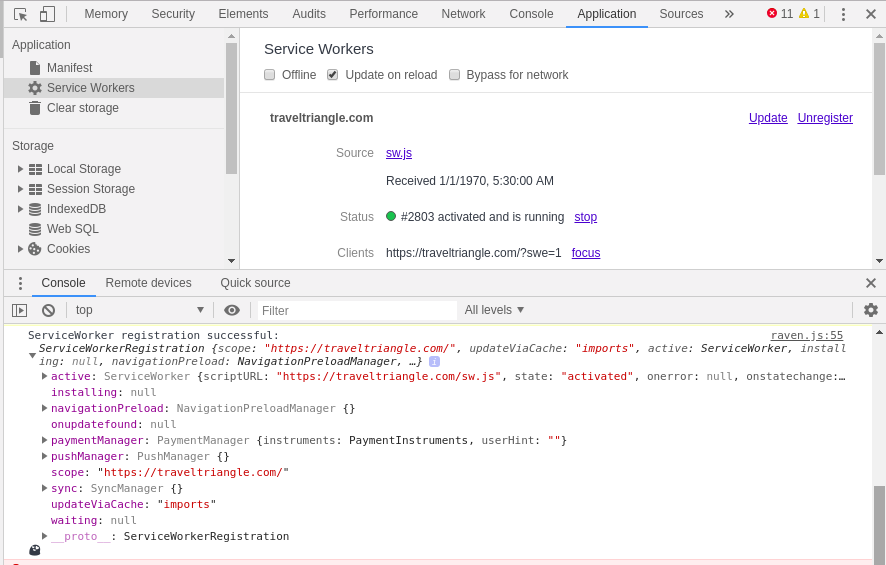
Everything looks good to go now. Congrats, that’s it! We have implemented our SW, which you can see in your Application tab of Dev Tools. Here I’m referencing TravelTriangle’s website. (Yep, I work here 😉)

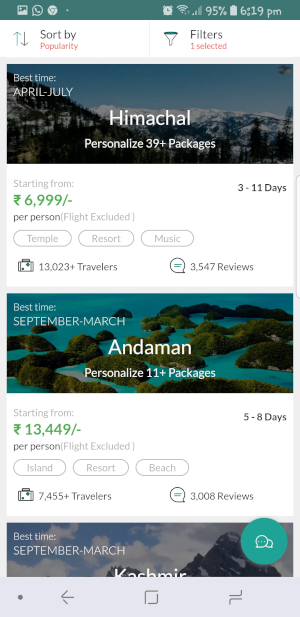
But wait, there is more to it. PWA apps are known to be accessible offline to the users, so they don’t have to open the browser and visit our website. We can allow them to Add our app to their home screen. We can achieve this one too, by introducing another file, manifest.json6 and adding this to our HTML when we initially send the HTML to the client using the code <link rel="manifest" href="/dist/manifest.json" />.
{
  "//": "webpack/manifest.json",


  "short_name": "TravelTriangle",
  "name": "TravelTriangle",
  "icons": [
    {
      "src": "http://www.cdn-site.com/192/logo.png",
      "sizes": "192x192",
      "type": "image/png"
    },
    {
      "src": "http://www.cdn-site.com/512/logo.png",
      "sizes": "512x512",
      "type": "image/png"
    }
  ],
  "start_url": "/",
  "display": "standalone",
  "theme_color": "#2f847d",
  "background_color": "#ffffff"
}
Now your application will display an Add to Home Screen link at the bottom of the browser window.

The application will have its own splash window.

And, it will be running in full screen. Sweet!

So far so good, and everyone is happy!!
But, while developing a feature, it is not that straightforward process. You run into multiple issues. You try different things to make the feature work. This was the case here too. We ran into some issues and we took different steps eventually making the feature fully functional.
This is the backstory. Follow to Part 2 for this adventure.
Thanks for stopping by. See you next time.
https://developers.google.com/web/fundamentals/primers/service-workers/lifecycle. ↩︎
https://developers.google.com/web/fundamentals/primers/service-workers/. ↩︎
https://developers.google.com/web/tools/workbox/guides/precache-files/ ↩︎
https://developers.google.com/web/tools/workbox/modules/workbox-strategies ↩︎
https://developers.google.com/web/tools/workbox/modules/workbox-webpack-plugin ↩︎
https://developers.google.com/web/fundamentals/web-app-manifest/ ↩︎